Behaviours
Behaviours was the one key thing I had forgot to try and do to get my links to other web pages to work. John rocked in and done it in two minutes which was a bit frustrating considering how long I was here last nite trying to get it to work. but its done now and it works so Im glad.
all the different page layouts

This is a small gallery for each of the two books that i scanned pitures out of. They are bothe related to stencils and i wanted to show a little history of what has been done before

This is what happens when your click on one of the pages in the gallery the picture is just shown larger so you can see whats going on a little better

This is a page of work that I have done and a close mate, and some of his work. I like the photos at the top change in photoshop to look like a stencil and the fact that alot of the time when you do some work nobody knows who the artist is. Hense why you cannot see our faces

This is the book review page. The books are Melbourne the stencil capital and street logos. This is my favourite page as I like the design it looks goo its interactive things move, its great.
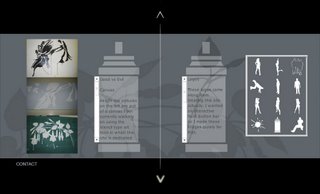
This page is dedicated to a new series of art work using the stencil form i have recently started so decided to put that in there as most of my site revolves around that bell flower. well thats where it come from. I am a little dissappionted I havent got as much work that i could put on the website as i have given alot of it away and i dont have a digi camera so i havnt been able to record them.

This page is just the main page that links off to all of the rest its simple and is actually slightly different to that on the screen. I managed to get my link bar working so that is also on this page linking to other related sites or just the ones I find interesting
different pages in my site

This is the opening page of my site before you enter it took me along time to learn how to use the masking tools in flaash but i managed to figure it out. im not entirely happy with this page its pretty boring really but it catches the eye that the plant is actually growing on the screen.
more pages
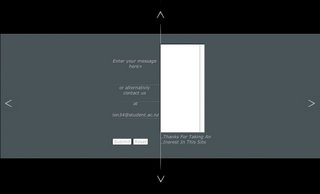
This is my contact page I hope i have got the email address thing working if not i put my email address so people could contact me otherwise. A thankyou for visiting is also there just to thank viewers

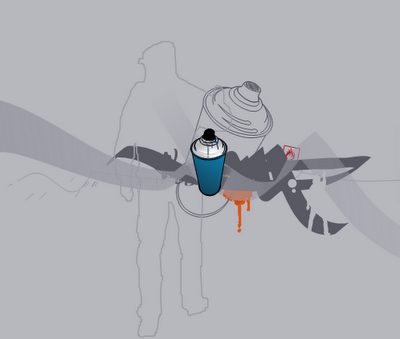
The content of this page is all the equipment needed for ths type of art work. If i had more time i would go back and talk to john about making a trolly cart so you could actually buy certian products from the site if you wished. This includes art works and comissioning for art works.
analysis
Overall my site I think is looking and functioning well, its easy to navigate around pages dont load up slowly they are quick as even though i have a bit of flash on most pages. The design is simple. doesnt take up much room on the screen only the standard size 1020px by 600px.
Holly #!$%@*
This has been a bit of a pain this site mainly my own fault for trying to make it interactive but im almost there everything is linking well except for FLASH BUTTONS WHICH I HAVE BEEN TRYING TO GET TO LINK TO OTHER RELATED SITES BUT I CANNOT FOR THE LIFE OF ME FIGURE IT OUT. I guess Ill talk to john tomorrow and see if he can help me out if not its not that important my site will do without. Just would have liked it to be part of it to show I could do it.
flash tutorial i found on the net for text scrolling
Flash Static Text Scrolling
To create effect of scrolling text we are going to use a Flash Motion Tween of a text symbol. We will take the text at one point in frame 1 to the end of our animation frame 350. Begin with a clean Stage and select the Text Tool from the Tools window. Choose static text, black text color, font size of 15 and a Verdana font from the Properties window.
We are going to be working with a lot of area that isn't on the stage, so it will make your life easier if you change the viewing area to 50% to shrink the Stage and show more of the "imaginary" Flash Stage.
With Frame 1 selected in the Timeline window create a new textbox by click-dragging the Text Tool just below the the viewable stage area. Your box should be about same size as we have.
Copy and paste the following text into this new textbox:
"In a tutorial far, far away there was a lesson that was so incomprehensible that not even the Great One could decipher its meanings and yet people still fussed over its text everyday in hopes of some revelation, but they were to be disappointed because the tutorial was written in jest by the Not So Great One to get back at the Great One for being less than great."
Move Text Field
Now you need to insert a KeyFrame at Frame 250. With frame 250 selected drag the text box above the stage's viewable area like we have:
While still in frame 250, drag the text field above the viewable Stage area.
All you need to do now is just right-click any frame from 2-249 and choose Create Motion Tween and you have finished creating Text Scrolling! Go to Control < Test Movie to view your masterpiece.
You may view our finished Flash project or download our Raw Flash file if you are having trouble doing it on your own.
Flash Textbox Input Scrolling
Creating a Textbox Input that scrolls is very easy in Flash because Macromedia has gone to the trouble to create everything for you. All you need to do is drag and drop the right components in the right place and Macromedia Flash Magic will do the rest.
Creating a Flash Textbox Input
With a clean Stage, select the Text Tool from the Tools window and choose the following from the Properties Window:
Input Text from the Text Type drop down selector
Enable - Show Border Around Text
Multiline from the Line Type drop down selector
Now drag a Text Input Box like we have below. Note: We want to make it large enough so the scrollbar doesn't get squished inside this textbox.
To open up a list of the droppable interface components that Macromedia Flash has go to Window < Components. Inside the Components window, scroll down until you see User Interface and Expand this directory. Scroll to the very bottom of the User Interface directory until you get to UIScrollBar.
Drag and drop this scrollbar to the righthand inside area of the text input box. If you do not place it inside the input box then the ScrollBar will simply float and not function as we want it to. The scrollbar can be seen below, outlined in blue.
Next Control < Test Movie and type in a bunch of text until you need the scroll bar.


